Thursday, January 29, 2015

Halloween Party Food and Decorations for Kids

Spooky Children's Halloween Party Crafts

childrens, halloween, party, crafts, kids, spooky, diy
The children's party table with ghostly juice boxes, bubbling witches' brew, favor bags, and costume contest prize and voting cards
It has been a while since I've been able to write a post- Having three children under 5 tends to take up a vast amount of my time. However, this past Halloween I was able to squeeze in a few moments to work on some crafts for a Halloween party I was throwing for some friends and their children. I worked on these crafts one at a time over the course of a week, so that when the big night arrived, I was not stressed at all. These crafts were all easy, cheap, and the kids and adults all loved them. 


Halloween, foyer, table, decoration, day, dead, night, spooky, hauntedFoyer Halloween Decorations:

Let's start with some decorations. For the entrance table, I was able to reuse some cheap decorations I purchased at the Dollar Store to create an eerie entrance table that wasn't too scary for the kids. The candles are LED so they don't pose a fire hazard and as a bonus they have a built in timer that turns them on and off at the same time every day.  

The second picture is my absolute favorite DIY decoration that reminds me of the floating candle hall in the Harry Potter movie. It took me less than an hour to complete and the total cost was under $20. The end result was incredible, and these pictures just don't do it justice. 

floating, candle, ceiling, halloween, party, kids, diy, cheap, harry, potterFloating Candle Decoration:
Materials:
floating, candle, ceiling, harry, potter, sky, halloween, cheap, diy
  • Sheer black curtain (Big Lots, $5)
  • 24 flameless votive candles (2- 12 packs at Big Lots were $6 each)
  • Fishing Wire
  • 6 thumbtacks
Standing on a chair, I attached the curtain to the ceiling with the thumbtacks, placing one tack on each corner and the remaining two on either side of the long end.  I then cut a long piece of fishing wire and attached it from one end of the tack to another, creating the shape of a rectangle with an X- shape on the inside. Next, I looped a piece of fishing wire around the bottom of the votives, tyeing a knot at the top of the flame to secure it to the string. Using the two free ends of the fishing wire, I tied each votive to the fishing wire frame on the ceiling, making each one a different height for interest. That was it! When night came, I simply reached up and turned each one one and the effect was stunning. The light of the candles were enough to give the room a soft glow, and the black curtain on the ceiling made it appear as if the candles were floating in the sky. I am definitely doing this next year.


The kid's party food and decorations were a lot of fun, were cheap, and so so easy. 

Smoking Cauldron Punch:
Materials:
  • Black punch bowl (Walmart, $1)
  • Punch Recipe (I used a combination of fruit punch, orange, pineapple, and apple juice but you can use any red-colored punch)
  • Ice cubes
  • Dry ice (found in the front of most grocery stores. You will need at least a pound. Bring a thick cooler to store on the ride home)
The smoking cauldron was super easy and added a dramatic effect to the children's party table. After adding the punch and ice to the bowl, I then occasionally tossed in a few small chunks of dry ice. The dry ice was so neat because not only did it give the cauldron a smoking effect but it also created bubbles and large balls of ice as the dry ice froze its own bubbles. A word of advice on the dry ice, though: please use gloves or an oven mitt when handling and instruct kids not to pick it up as it is very cold and will burn. 

Ghostly Halloween Party Juice Boxes:
Materials:

    halloween, party, kids, ghostly, juice, boxes, diy, craft, easy, cheap, ghost
  • Barrel juice boxes ($4 for a box of 16)
  • White duck tape (found in the paint section at Walmart, $4)
  • Black sharpie ($2)
  • Black pipe cleaners ($1)
  • An assortment of googly eyes ($1, in most craft sections)
  • Glue gun and glue sticks

 The kids loved these juice boxes. To make, simply wrap the white tape around the juice box, glue on eyes, draw an oval-shaped mouth, and wrap a pipe clear around the top, bending it on each side to form wavy arms. For added fun, I wrapped one end of the pipe cleaner around the straw that came with the juice boxes. They were almost too cute as some of the kids ended up taking their home instead of drinking them.

Graveyard Pudding Cups:
Materials:

  • Instant chocolate pudding
  • Milk
  • Box of Oreo cookies
  • Ghost Peeps and/or tombstone cupcake decorations (found seasonally at Walmart or craft stores in the halloween section)
  • Tiny bone cupcake sprinkles (in seasonal halloween or baking section)
  • Clear plastic drinking cups
  • Tiny black spoons (also found in halloween section or at most party stores)
All you need to do is prepare the pudding and pour into cups. Crush the oreos by placing in a bag and whacking with a meat tenderizer or rolling over it with a rolling pink. Plop a ghost on top and you're done. The pudding can be prepared in advance and added to the cups before the event. 


Southwest Spider Cheese Ball: (recipe found here)
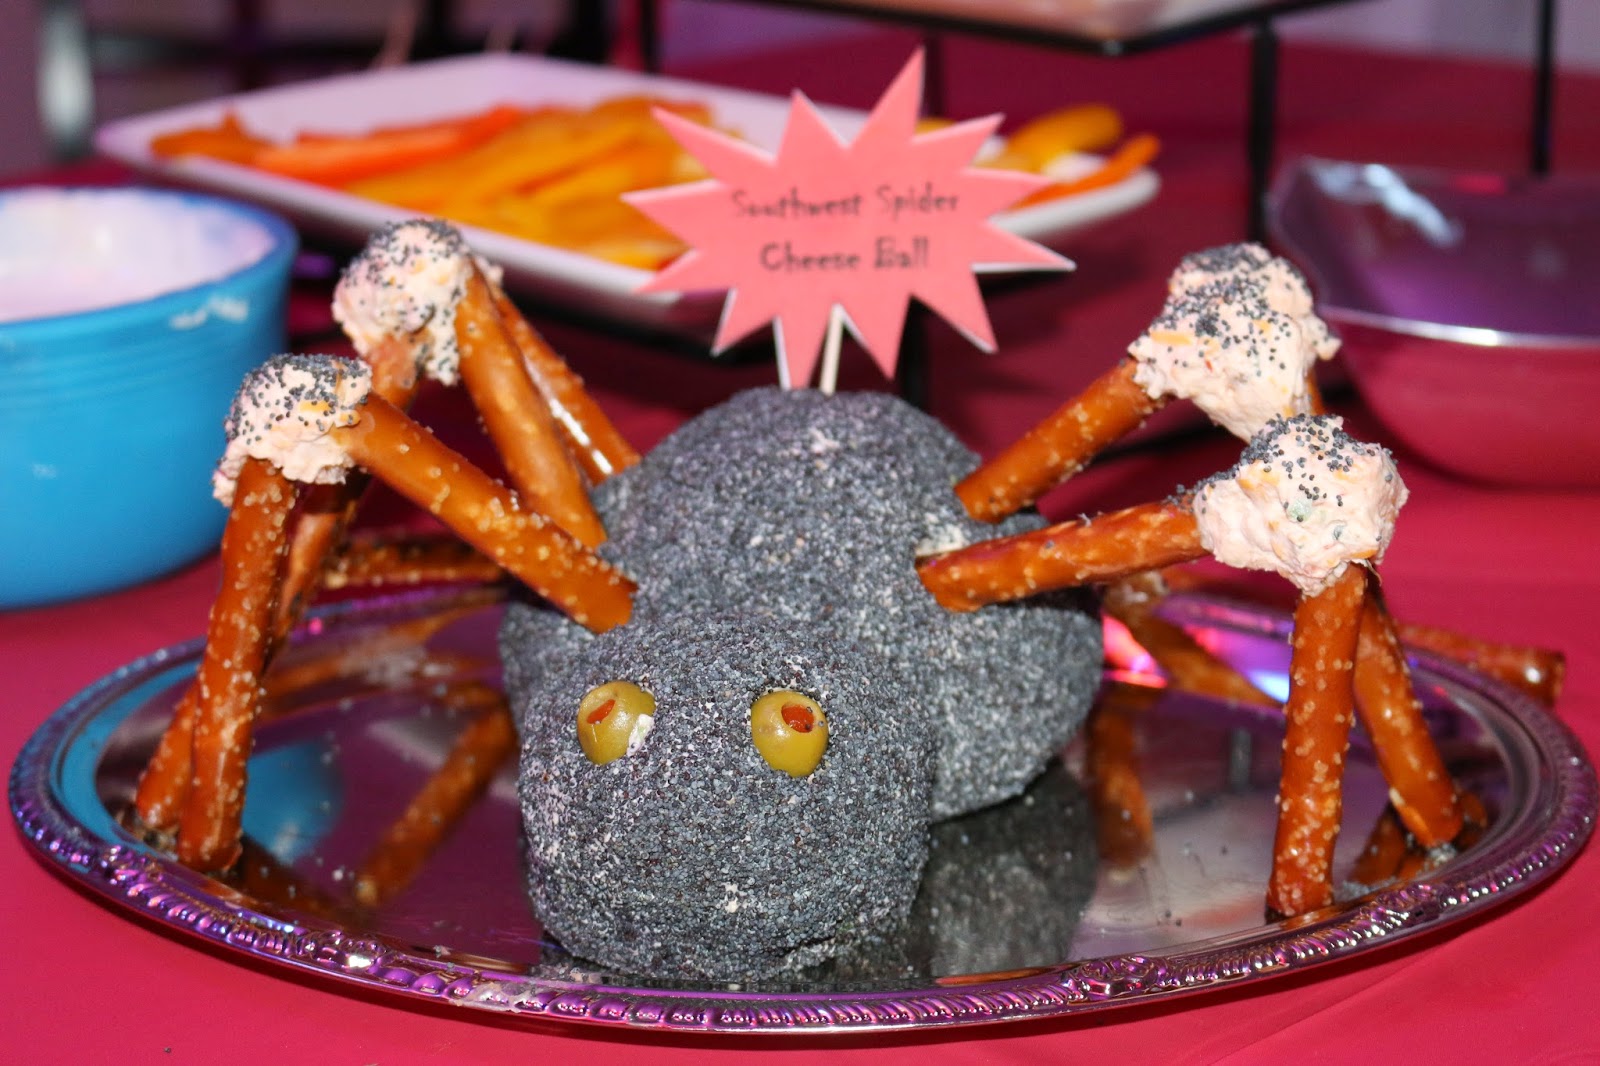
southwest, spider, cheese, ball, kids, halloween, party, cheap, dyThis is the second time that I have made this cheese ball because it is so easy, cheap, looks so spooky, and tastes great. It can be prepared in advanced, with only some last minute work. The time it took me to prepare the cheese ball and complete the look took me less than 15 minutes total. It was ridiculously easy and the guests loved how creepy it looked on the party table. Follow the link above for the recipe.


Monster Ham and Swiss Sandwiches:
Years ago, a friend gave me a recipe for these awesome party sandwiches that I have since seen almost everywhere online. And for good reason. They are really good and easy to prepare for a party. At this Halloween party they were gone within minutes.


Materials: (makes 12 mini sandwiches)

  • 2 pounds of good quality ham, shaved or thin-sliced
  • 2 packs of swiss cheese (about a pound)
  • 1 cup of butter (2 sticks)
  • 1 1/2 Tablespoons Dijon mustard
  • 1 1/2 Tablespoons Worchestershire sauce
  • 1 Tablespoon poppy seeds
  • 1 teaspoon onion powder (optional)
  • Toothpicks
  • Googly eyes
  • Glue gun 
Prepare the toothpicks in advance by gluing the googly eyes onto the flat end of a toothpick. Store in a plastic baggie until ready to use. The day before the event, melt butter and mix in dijon, worchestershire sauce, and poppy seeds. Slice the bread rolls in half as if making a sandwich, trying to keep the rolls together as a single unit. Divide the ham amongst the bottom half, then layer the swiss cheese on top. Replace the top of the rolls, and drizzle the butter mixture over top. Refrigerate overnight. When ready, preheat oven to 350 and bake for 15 minutes. Separate the sandwiches and serve warm. Recipe can be doubled, tripled, or tailored to however you need. I doubled the recipe for my party and there were no leftovers. 

Vampire's Blood Drink: (alcoholic)
vampire, cocktail, blood, halloween, adult, drinks, syringe, smoking, party, easyI had to include this party drink, as it was visually striking and was a huge hit for the adults at the party. I used the recipe as was written in the original post which included (a lot of) alcohol, but the author also mentioned that this could be made kid-friendly simply by omitting the alcohol. Here is the original recipe for Vampire Cocktail. Below are pictures of the end result. The drink came out pretty strong by itself, but when the raspberry "shots' were added it balanced it out well.  For added effect, I used some of the ice I bought for the smoking cauldron punch (above) to make the cups appear as if they were smoking. The syringes can either be bought at a party store or ordered online through medical sites for a more realistic effect. They can be rinsed and reused for another time. I bought a cheap silver platter at the Dollar store, laid a paper towel over top, and let some of the syrup drip onto the paper towel, making it look like a creepy medical tray. To save on time, I combined all of the ingredients into a large glass container and stored in the refrigerator. The syringes were also prepared ahead of time, capped, and place in the fridge. So all you have to do at the party is fill the cups with ice, pour in the drink, and let your guests select a syringe. This is a terrific Halloween party cocktail!


<a href="//www.brandbacker.com" target="_blank"><img src="//images.brandbacker.com/badges/no_badge.png" title="BrandBacker Member" alt="BrandBacker Member"></a>


Monday, September 5, 2011

Basic Basil Pesto Recipe (with pictures and steps)


Fresh sweet basil leaves

One of the easiest plants to grow in Virginia is a basil plant, and there is no shortage of this ingredient during the summer for one of the most versitile dishes around: basil pesto. Pesto is not only great on pasta, but on potatoes, bread, and meats as well. My favorite sandwich during this time of year is composed of freshly made bread evenly spread with pesto and topped with grilled chicken breast, fresh tomatoes, and mozzarella. Absolutely heavenly!


Ingredients:
  • 2 cups fresh basil leaves, packed
  • 1./2 cup parmesan cheese
  • 1/3 cup pine nuts (I use walnuts because they are generally less expensive, but shhh...)
  • 2-3 garlic cloves
  • 1/2 cup olive oil
  • a pinch of salt and pepper, to taste

Instructions:
  1. Prepare your basil leaves by placing into a colander or a bowl, and rinsing with water. I am a little bit obsessive about how clean my food is, so I tend to wash the leaves several times before I am satisfied. Make sure the leaves are thoroughly dried before proceeding to the next step.
  2. Combine ingredients into a food processor. If you are using walnuts, it is best to grind them along with the garlic before adding the leaves, as the leaves will tend to darken in color. For this post, I did not do this, so my pesto turned out darker than usual. It does not have any effect on taste; it's just a matter of color preference.
  3. Pulse for a few seconds until leaves are evenly pureed. That's it!

Fresh Virginia basil pesto


Friday, September 2, 2011

How to Make a Garden Pond

Imagine yourself having dinner outside on a warm summer evening, listening to the peaceful sounds of falling water over river rocks. Unfortunately, not many of us live near a natural pond or stream. However, there are easy ways to create your own garden pond complete with a waterfall or fountain. Adding a water feature to your garden or patio is actually much easier than you'd think. All you need is a little patch of land, some water, and a few supplies and you're on your way to complete Zen...

Supplies:
*Shovel
*Pond pump with filter
*Tubing
*A few bags of sand
*Various rocks
*Pond liner


Instructions:
Designate the place where you want your pond to be located and draw a rough outline with your shovel. Next, dig a hole into the ground at least two feet that will be filled with water. This is the part that will be the most time consuming.


Once you have your hole, fill it with your purchased sand to create a nice cushion layer over which your pond liner will sit. We have rock hard Virginia clay here, so I used some old foam scraps left over from another project along with the sand.


Gently open out your pond liner and completely cover your hole. Using scissors, cut off any of the excess liner. The beauty of using pond liner over a pre-formed hard liner is you can be creative in designing your own shape. I liked the Azalea bush in my backyard so much that I decided to create my pond around it. When the bush blooms, it is absolutely stunning.

Lay some heavy stones over the liner to hold it down. You can get creative and build your own wall by stacking your stones as shown.


Assemble your pond pump according to the instructions and place in the deepest part of your pond.


Next comes the fun part. Throw in a garden hose and turn on the water. In a few hours, your pond will be full and you can plug in your pump.

That's it!

White Chocolate Cheesecake Tuxedo Cake Recipe

I made this cake for my husband's birthday this year. It was fairly complicated to assemble with all of the steps involved, but well worth the effort in the end. I will definitely make this cake again.


Ingredients:

CHEESECAKE LAYERS:
*1 1/2 lb cream cheese; softened
*2 cup confectioner's sugar
*1/2 cup sour cream
*1 tsp vanilla extract
*6 oz white baking chocolate; melted, cooled
*2 envelopes unflavored gelatin
*1/4 cup cold water

CHOCOLATE LAYERS:
*1 1/2 cup semisweet chocolate chips
*1/2 cup butter; softened
*1/2 cup granulated sugar
*2 eggs
*1 tsp vanilla extract
*1 1/2 cup all-purpose flour
*1 tsp baking soda
*1/2 tsp salt
*1 cup sour cream

CHOCOLATE SOUR CREAM FROSTING:
1 1/3 c semisweet chocolate chips
6 tb butter
2/3 c sour cream
1 ts vanilla extract
3 c confectioner's sugar

FOR THE WHITE CHOCOLATE CHEESECAKE LAYER: Beat cream cheese with confectioners sugar until smooth. Blend in sour cream, vanilla extract and white chocolate. Stir the gelatin into the cold water in a small saucepan and allow mixture to stand several minutes to soften. Then heat mixture gently over a low setting until thoroughly dissolved. Cool briefly, then blend into the cream cheese mixture. Line bottom of a 9-inch springform pan with foil, then coat pan and foil well with a nonstick spray. Pour mixture into prepared pan, cover top of pan and chill until firm. This cheesecake layer can be prepared up to two days in advance, and held in the refrigerator.

FOR THE CHOCOLATE LAYERS: Melt chocolate chips in a small heavy gauge saucepan over low heat. Remove from heat and cool slightly.

Preheat oven to 350F and arrange rack to the center position. Grease and flour two 9-inch round cake pans. Cream the butter with the sugar until very light and fluffy. Add the eggs, one at a time, beating well after each addition. Stir in the vanilla extract and the cooled, melted chocolate. Whisk the flour with the baking soda and salt and gradually stir into the batter. Blend in the sour cream and divide batter evenly between the two prepared pans.

Bake at 350F about 25 minutes or until layers spring back when lightly pressed in their centers. Cool layers in pans 10 minutes, then loosen and turn out onto a rack to complete cooling.

YIELD: Two 9-inch layers

CHOCOLATE SOUR CREAM FROSTING: Melt chocolate chips and butter in a small,heavy gauge saucepan over low heat, stirring until smooth. Transfer mixture to a large mixing bowl and cool 10 minutes. Stir in sour cream and vanilla
extract. Gradually add confectioners sugar, beating until frosting is smooth.

TO ASSEMBLE THE CAKE: Arrange one of the cooled chocolate cake layers in center of a cake plate, top side down. Placing top side (because of its moist surface) down will help to secure cake to plate, preventing layers from slipping after cake is assembled. Release rim of the springform pan. Holding cheesecake in one hand and chocolate cake layer (on plate) in other hand, quickly invert chocolate layer (plate and all) on top of the cheesecake. Quickly flip the two, now attached layers back over, so chocolate layer is again on bottom. Now, you can easily remove springform pan bottom from (now top) of cheesecake layer. Arrange the remaining chocolate cake layer (top side down) on top of cheesecake layer. Using a
long sharp knife and a slight sawing motion, carefully cut around rim of cheesecake layer to make it even with chocolate layers. Frost sides and top of cake and serve. The cheesecake layer will hold at room temperature several hours. For best results, serve cake within 3 hours of assembling. Refrigeration will cause the frosting to loose its beautiful sheen.

YIELD: One, three layer, 9-inch round cake


*The recipe in its original form is located at the following website: Chocolate Tuxedo Cake

How to make your own reusable nursing pads

I love these pads. As a nursing mother, I got tired of buying the expensive boxes of nursing pads that are good for one use and then tossed in the garbage, only to wind up in a landfill. These pads are great, because not only are they pretty, but they can be laundered over and over again with the rest of your clothes. I like to use an inner cotton layer, which allows skin to breathe and prevents sensitive skin from sticking and an outer flannel layer, which is soft and reminds me which side goes against my skin.

For your nursing pads, you need the following materials:
*Piece of cotton fabric measuring at least 5"x10"
*An old bath towel, or a piece of microfiber cloth
*Sewing machine and thread
*Scissors
*A drinking glass with a diameter at least 4"
*Piece of PUL (polyurethane laminate) fabric (optional, but I like to use to create a waterproof layer)


Instructions:
1. Spread out your fabric right side down.
2. Using a pen, draw an outline around your overturned drinking glass, making a total of four circles.
3. Repeat same procedure for your microfiber and PUL fabric, making two circles of each.
4. Using scissors, cut about 1 cm away from your outline on each circle, as shown. You should have a total of six circles.
5. Now, make your fabric sandwich. Create your layers as follows: one fabric circle (right side up), one fabric circle (right side down), one microfiber circle, and one PUL circle (marked side up).
6. Sew your layers together around your marked outline, stopping about one inch from your starting point.
7. Cut around your circle to clean up edges, leaving some uncut fabric in between your starting and stopping point for later.
8. Insert fingers through opening and turn fabric inside out.
9. Fold the excess fabric inward and pin to close up your opening.
10. Sew closely around outer edges of nursing pad.

And you're done! Pads will initially be slightly misshapen, but will regain their circular shape after ironing. If you are using PUL in your pads, take care when ironing as the PUL could potentially melt if overheated.


Thursday, May 13, 2010

Start with the seats


Although not in bad shape, the seats hidden underneath the faded covers are dirty and in need of some new upholstery.


The first challenge was getting the seats out of the car without damaging any of the original pieces. There are at least six different types of screws and bolts, all of which require a different type and size of tool to remove. After removing the entire passenger seat, the back of the seat was separated from the bottom. The headrests were an even bigger challenge. Instead of the two-pronged latch, these headrests have a single metal piece that slides down into a track which is attached to the back of the seat. Athough the headrests slide easily up and down, removing it entirely was quite an effort. With a luck, a little bit of cursing, and even more help from this detailed website (mustang headrest removal), they came free without too much of a hitch. My husband found the perfect tool- two metal chopsticks- since our personal tool supply is still at the beginner's stage.

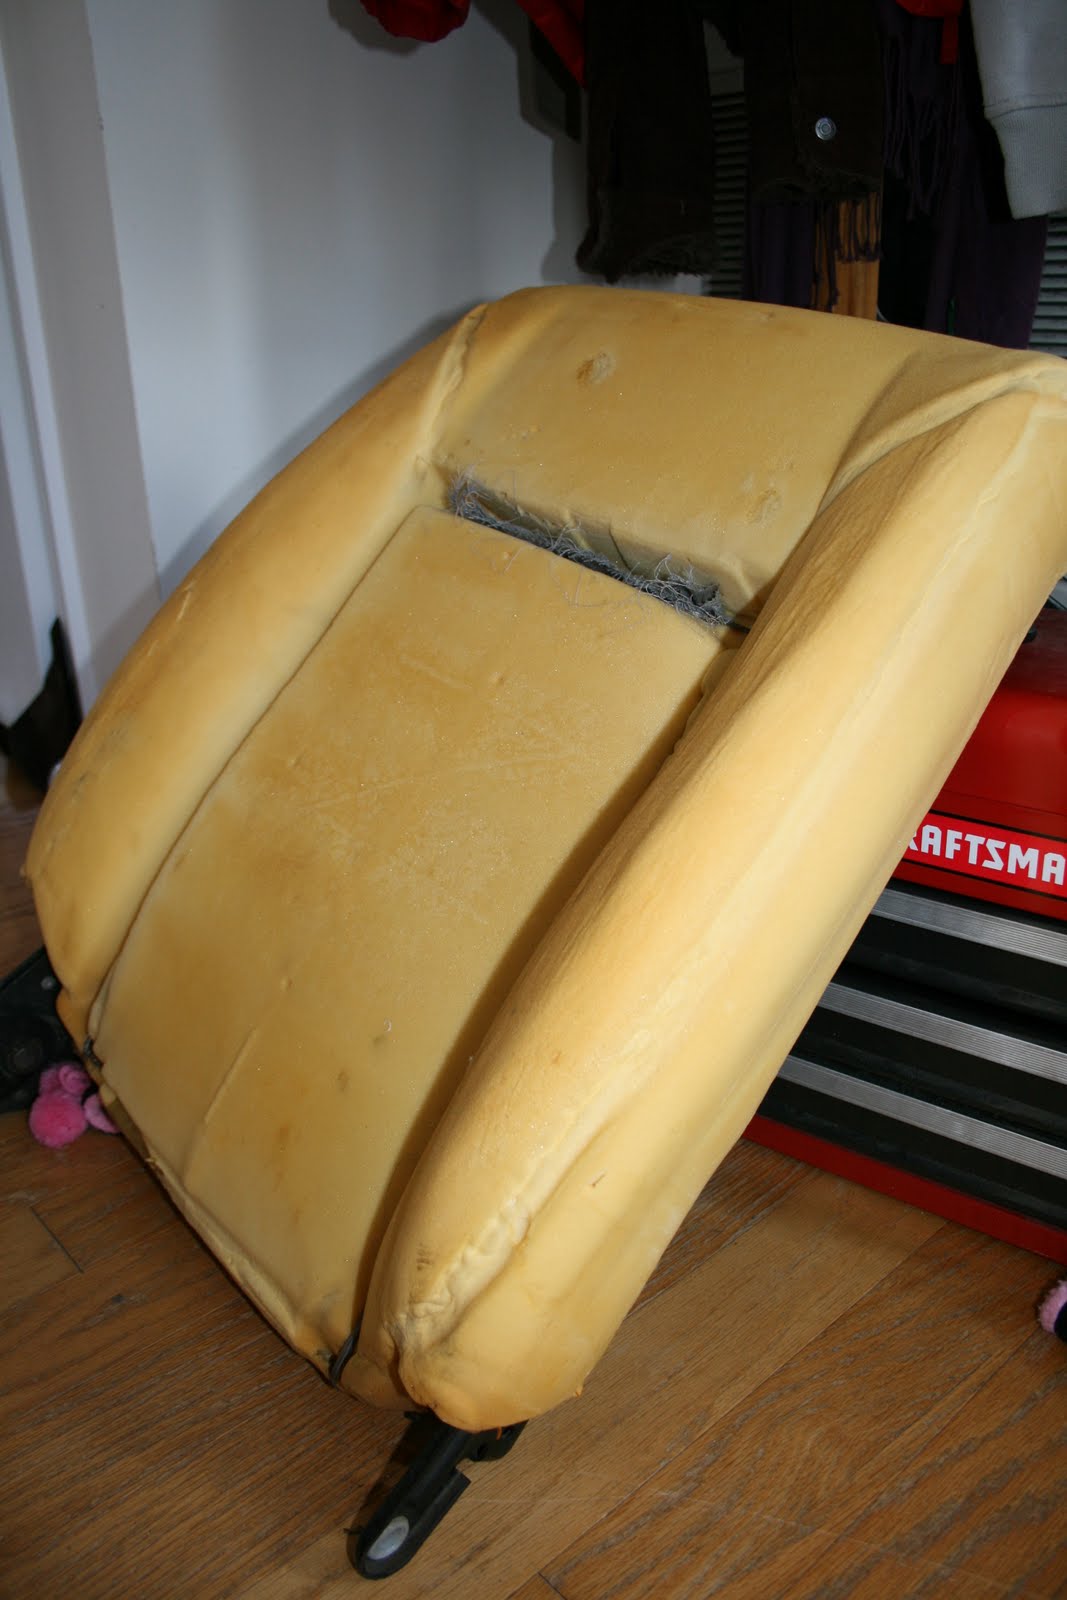
Once the headrests were removed, the upholstery was removed from the car seat and each piece separated at the seams. Despite the age, the foam cushions attached to the seat frame were in excellent condition and could be reused. Since the thin layer of foam underneath the vinyl was also in pretty decent shape, I decided to just reuse what I had an simply sew a new vinyl cover on top. Since I want to keep the original paint color of the car, I decided to go with a nice navy blue vinyl that I bought at Joann Fabrics. The fabric is made for marine vehicles since it is thick and water resistant, but can be used for pretty much anything else. I liked how it had a nice shine and a cloth backing, which made it soft yet durable. There is also a very slight stretch, which I figured would come in handy at the end.

After pinning each separated piece to the vinyl and tracing around it with a Sharpie, I cut out the new vinyl, making sure to cut on the outside of my marker line to give myself a little extra fabric just in case. There's nothing worse than spending hours on a new cover only to find out it's just a few millimeters too small! Using my sewing machine and some heavy-duty thread, I carefully sewed the vinyl to the old foam backing, then attached each piece together like the original. In the areas that were too thick for my sewing machine to handle, I hand-sewed for a secure seam.

After finishing the vinyl for the first seat, I decided I wanted to go with a two-toned color scheme. So, I simply swapped out the blue vinyl for white in the center section and ended up with the below image. Pretty badass, huh?

My next step after completing the vinyl is to somehow attach the covers to the foam backing. To do so, I need to secure the covers to the foam and secure it with hog rings. Since the local craft supply stores do not carry auto upholstery supplies, my next mission is to ask a local upholstery shop. Hopefully, they can give me some good advice...


E-scape with my Garlic Scape Walnut Basil Pesto Recipe

Last fall, my mom brought home some homemade scape pesto from the annual Garlic Festival at the Rebec Vineyards. For those that don't know what scape is, it is actually the stem of a garlic stalk that can be used in dishes as a lighter substitute for garlic. The pesto has a unique taste, and can be used as a spread on bread as well as a sauce for pasta. Since I am a huge fan of basil pesto, and happened to have a whole crop of garlic whose scapes have started to curl, I did some research online and found a recipe for Scape-Walnut-Basil pesto that I am sure will be fantastic. Check it out for yourself:

Above is a picture of the scape from my garden. Below is a picture of the finished pesto- I probably added a bit too much walnuts and not enough basil, but it is still delicious!


Friday, March 5, 2010

The project begins...


A few weeks ago, I bought an '83 mustang convertible off of craigslist after having somewhat of a "quarter life crisis" when my son was born and I realized that my sports car days would soon be replaced by the ever so practical mini van. I'm not knocking vans, because I could live in some of the newer ones out there today, but it is nearly impossible to comfortably move a car seat in and out of a two-seater without throwing out your back in the process. Anyway, the car was fairly cheap and since I've always been kind of a crafty person I thought it would be a fun project to fix it up and have something to drive on the weekends and maybe even pass down to my son someday.

Before delving into my foxbody mustang restoration project I began a little background research. '83 was the first year that Ford began making the convertible in the '82-'86 style. According to musclecarfacts.net, the 1983 mustang was one of only 23,438 convertibles built that year. The car is powered by a 6-cylinder, carburated engine and was deemed more aerodynamic that its predecessors.

Before I bought the car, I had never heard of a foxbody mustang. For some reason, the '79-86 mustangs seem to have gotten the shaft somewhere in the evolution of the mustang line. True, nothing beats the first generation mustangs or the newer, faster, fuel-injected models, but something about that boxy shape and fierce eyes draws me into proving that the foxbody mustang is deservant of the same recognition as the other styles.

So, here goes my first attempt at a restoration and project that I can truly call my own. I hope you enjoy my journey...